Prepping your Piece:
Some participants like to prep their piece prior to class! Prepping No need to match my design perfectly, feel free to add your own flair! For this class, we’ll be creating design guides to help us layout our composition and to use it as a guide while painting.
Step 1: Clean frames
You’re going to want to make sure you’re starting with clean frames. Clean all sides of your glass frame using a glass cleaner like Windex or remove any dust with a microfiber cloth. The goal is to remove smudges, fingerprints and dust.
- The following step are optional -
Step 2: The Design (optional)
Let’s get started by dreaming up what kind of design we’re going to create for our ornaments. I’ll be creating the following designs…
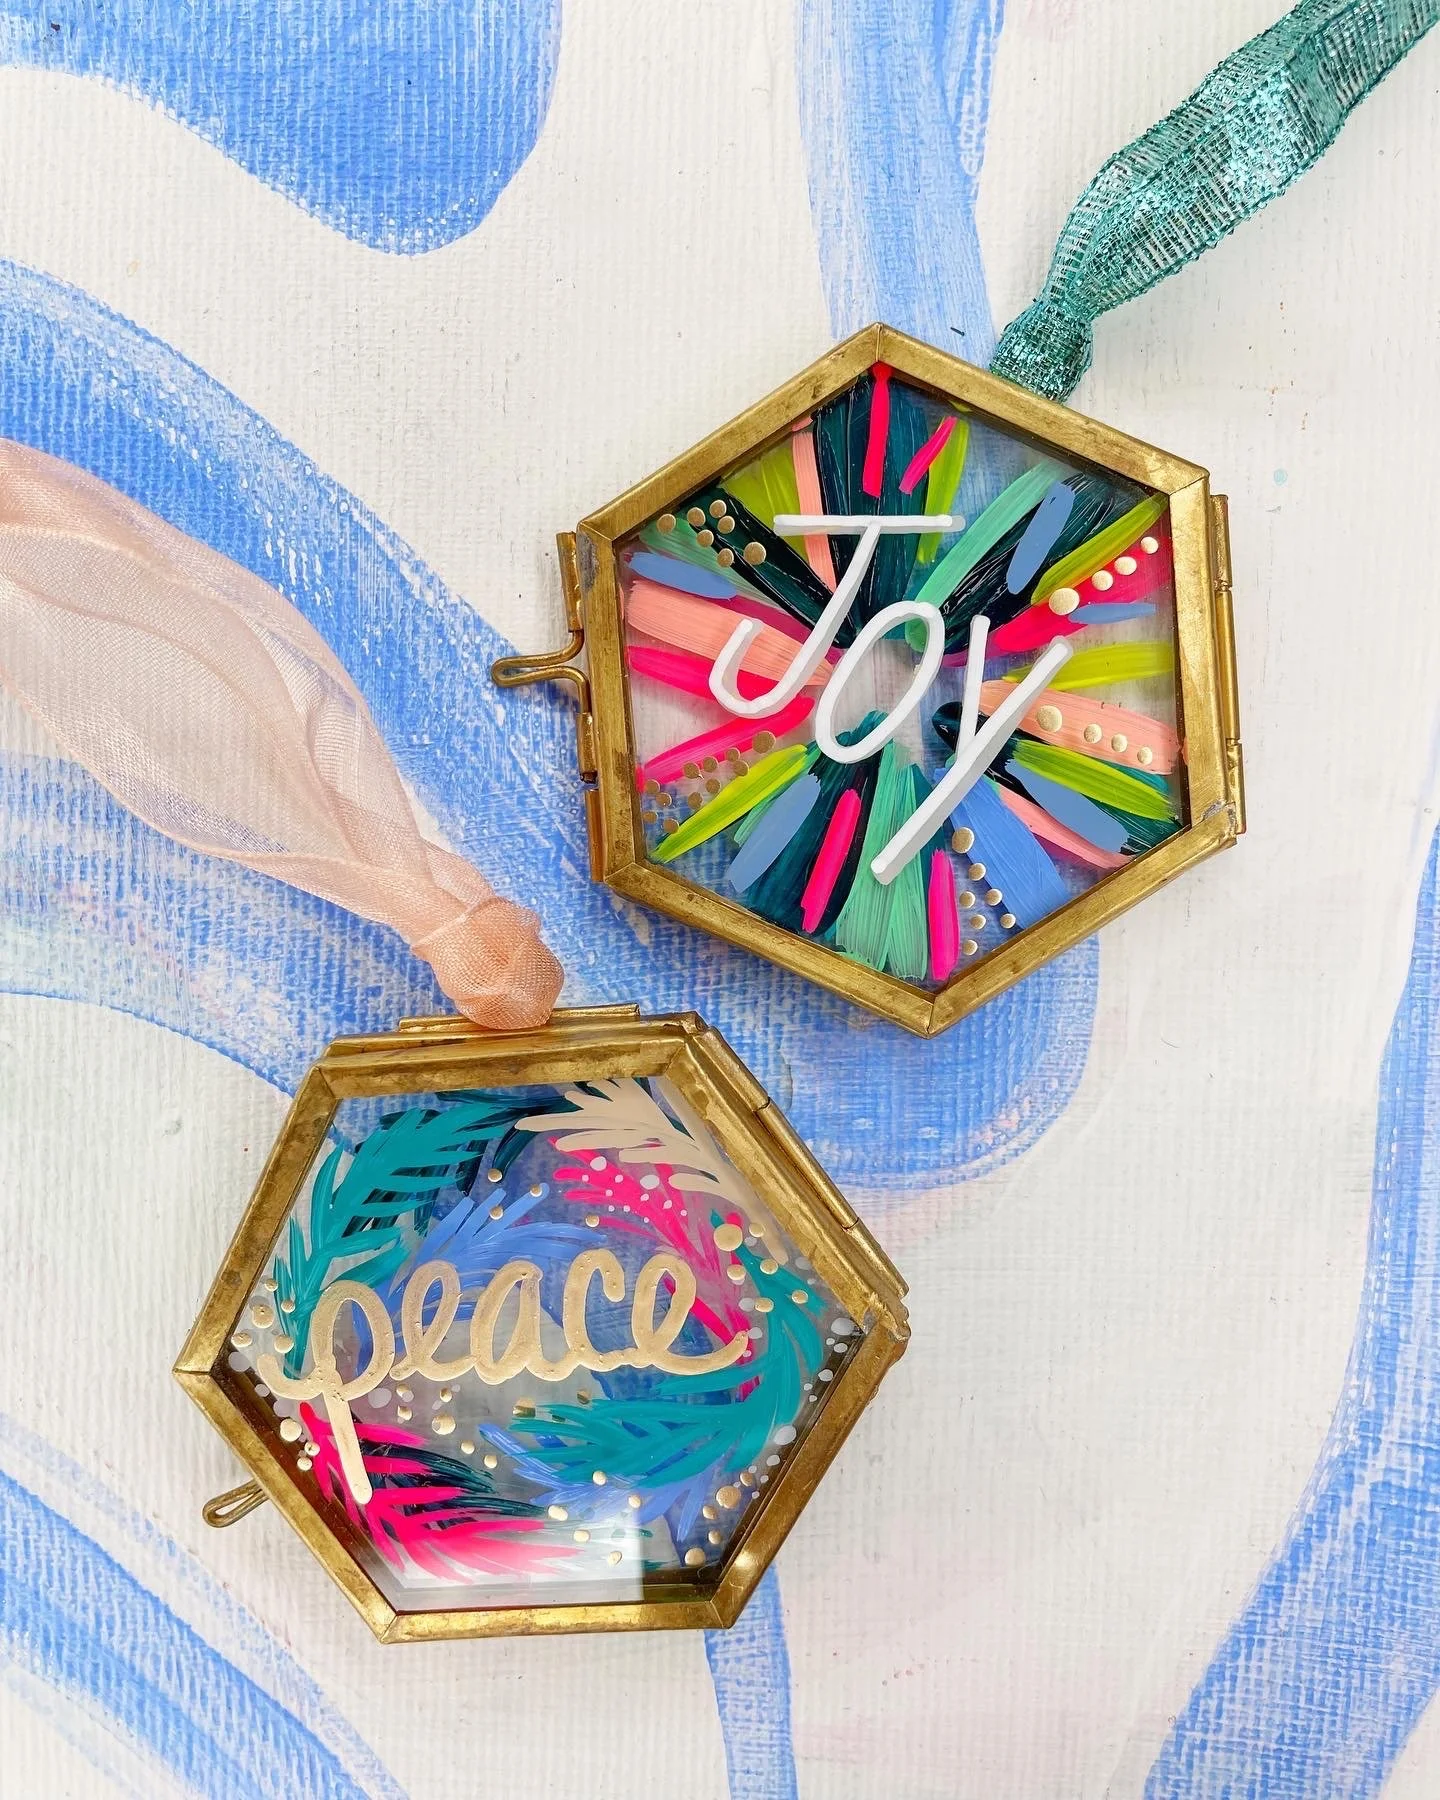
During class I’ll be showing you how to create the two designs above. Please feel free to switch up the design if you so wish. For example, maybe you want to write the word “cheer” instead of “joy”. Or maybe there’s another holiday design you have in mind. Please take a moment to study the image above. Take note of the placement of the elements and the layers in particular.
Step 3: Sketch
When painting on glass, It’s always a good idea to sketch out your design beforehand, especially if you’re going to be painting something different from my two designs. Grab a plain piece of paper and a pencil/ pen. Place your glass frame on the piece of paper and using the shape of your frame, trace the outside of your frame. This will help give you a general idea of the scale of the space you’ll be working in (especially if you’re not used to painting on a small surface). You can practice by sketching my same designs or play around with creating your own.

Step 4: Practice handwriting
You may want to practice writing out the word you’re going to use that convey’s the holiday season. As mentioned before, maybe instead of “Peace” you use “Cheer” or maybe a loved one’s name. Either way, it’s always a good idea to practice on paper first!
See you in class!
xo,
Jessi