Sunshine Blooms
Supply List & Prep
Items to grab when setting up your painting space:
A yellow posca pen or any yellow acrylic paint pen
Clean and flat area to paint
Water to clean brushes
Cloth or paper towels to dry brushes
Hair dryer for quicker drying
Please scroll to bottom to see how to prepare your piece!
Painting Surface
Below are suggestions of painting surfaces. You do not need all of the options below. Just one surface is perfect! I will be using Canson Acrylic Paper for this project. It measures at 8.3” x 11.7”.

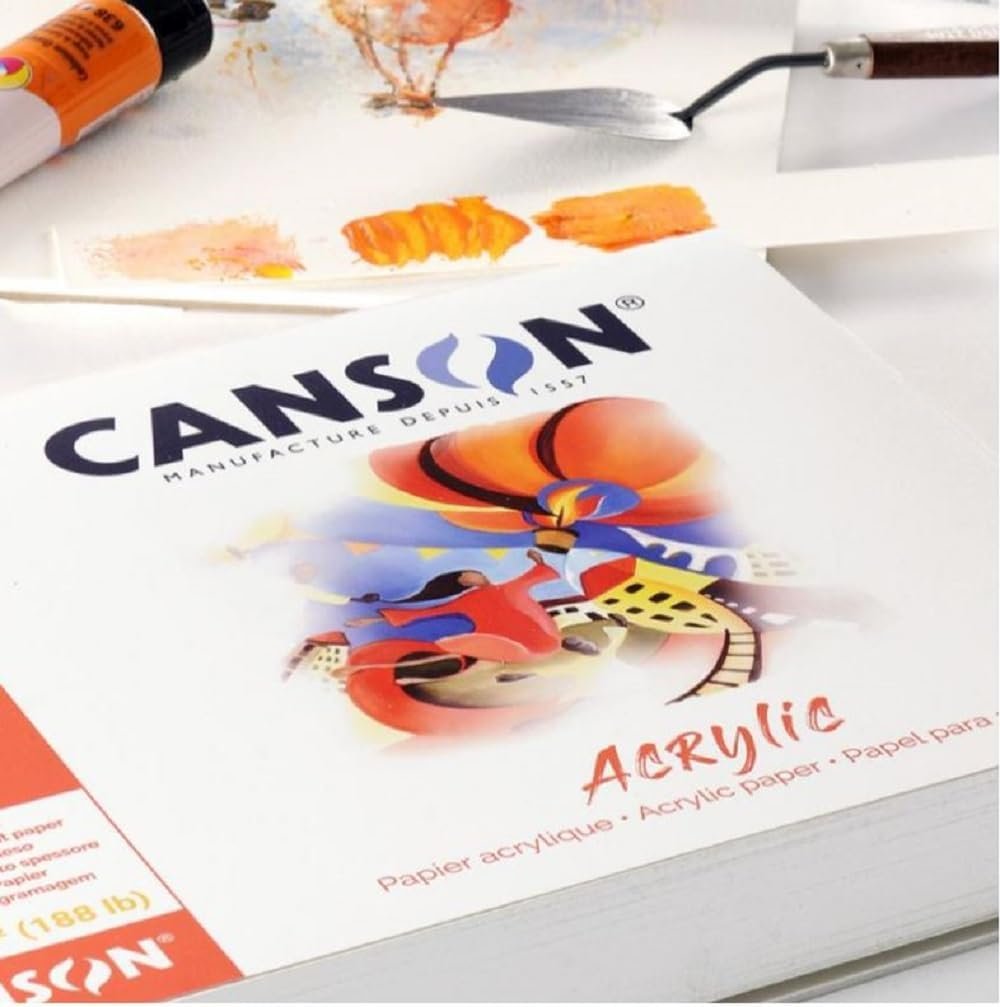
This is the paper i’ll be using in the class.


Paint Brushes*
Here’s a simple set that I came across on Amazon that has many sizes and at a great price.
I will be using a “Simply Simmons” Round brush, size 8 and a “Daler Rowney” System 3 Round Brush, size 4. I’ll also have few smaller detail brushes on hand.
Acrylic Paint
For this class, I’m going to give you the option to use either regular acrylic or heavy body acrylic.

Acrylic Paint - Basic Paint
You may use any brand of acrylics of your choosing for this paint session. I’ll be using Liquitex Basic Acrylic. They’re cost effective and great for leaning. Feel free to select any specific colors that you want in your piece.
Colors
Titanium White
Fluorescent Pink
Cadmium Yellow Medium Hue
Turquoise Blue
Cobalt Blue
Fluorescent Yellow
Optional - If you’re going for a certain color palette don’t hesitate to grab any additional colors that you may need.
Acrylic Paint Pens

Posca Pens
Feel free to pick up any colors you’d like!
I’ll be using white and yellow.
Metallic Paint Pens
The brands mentioned below are suggestions. Feel free to use whatever you already have on hand or can easily find at your local art/ craft store.

Prepping your Piece
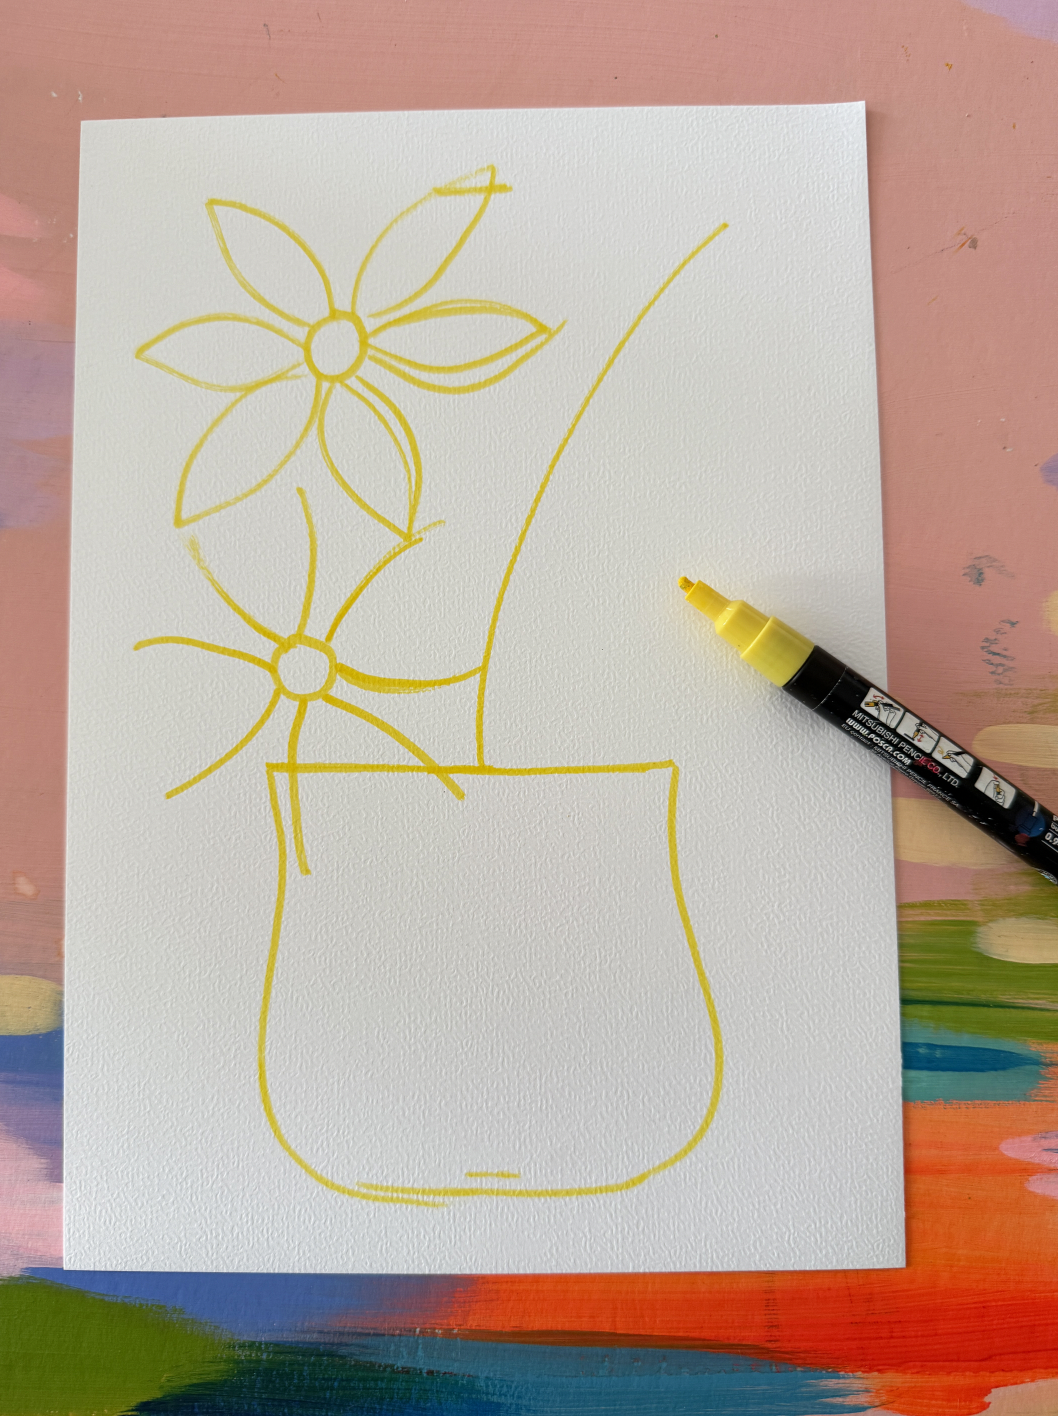
Some participants like to prepare their piece prior to class! I will walk though the drawing process in detail in lesson 1, but you can get a feel for what we’ll be doing below.
No need to match my design perfectly, feel free to add your own flair! For this class, we’ll be creating a sketch to help us layout our composition and to use it as a guide while painting.
Step 1: Measure an inch down from the top and an inch up from the bottom and draw a small line. This is to give ourselves a bit of a border to work within. Next, draw a short line about four inches up from the bottom line.

Step 2: Draw a basket. Notice mine has a slight curve to it near the bottom.

Step 3: Next sketch who flowers on the upper & center left side of the page. I skteched six petals for the upper flower and four loose “v” shapes for the bottom flower.

Step 4: Sketch a slightly curved line. This will be the spine of our palm leaf.
Step 5: Sketch the leaves onto the spine. Make sure to keep the leaves organic in shape.Draw four small “u” shapes on the right side of the palm leaf.

Step 6: Loosely sketch 3-4 petals a the top of each of the “u” shapes.

And that’s it! See you in class!