The Simple Way to Remove a Background in Photoshop
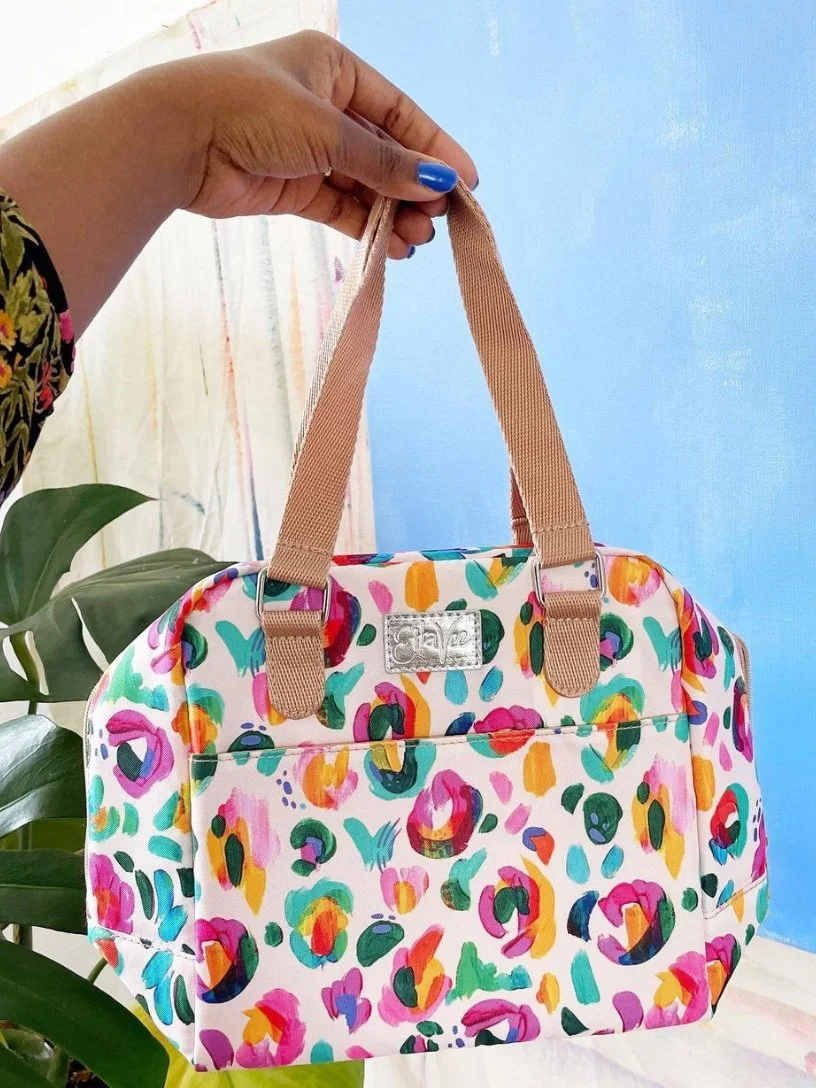
In this blog post, I want to share a quick tip for removing the background from your art in Photoshop. But you may be wondering why this is important. If you’re interested in art licensing or selling your artwork online, turning your analog artwork into a digital file is a crucial skill to learn. For example, my leopard print design is now licensed on all kinds of products like phone cases, bedding, planners, and lunch bags (just to name a few!). But it started as an analog painting that I turned into a digital file.

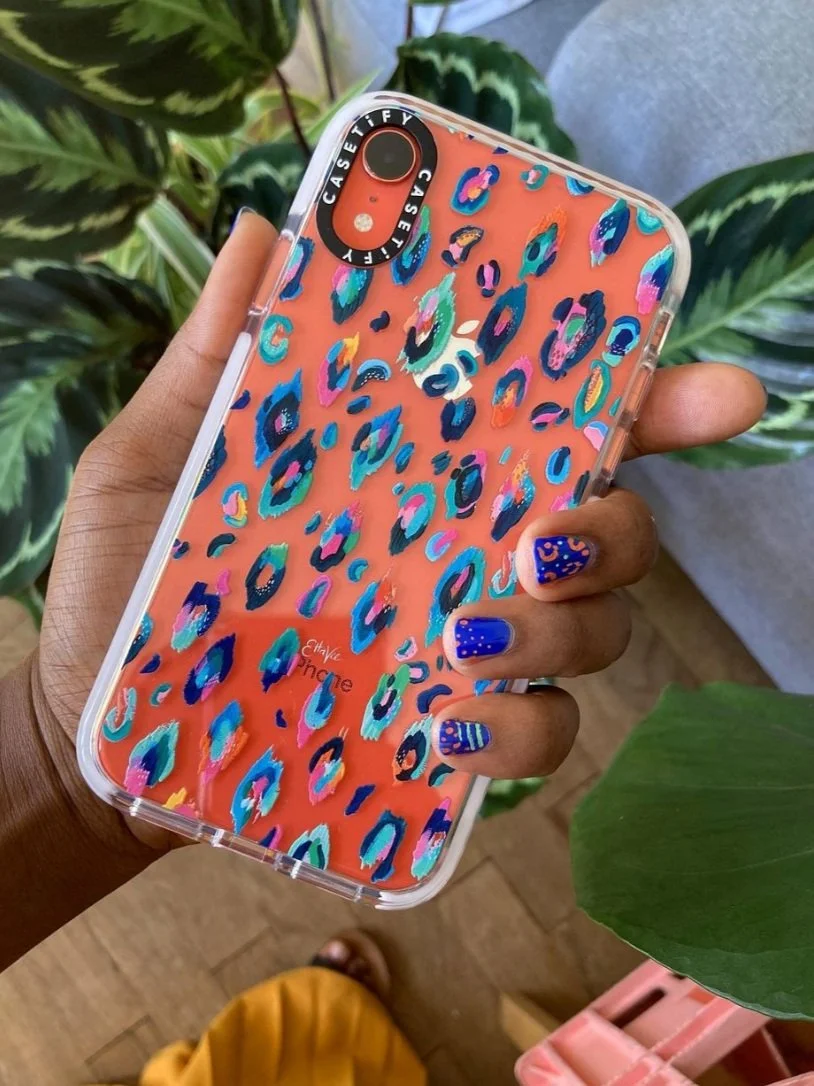
In the example of the phone case, I needed to remove the background from this design in order to fit the style of that product. Removing the background from your illustration gives you so much flexibility in the kinds of products that it can be used on. The paper background can also look a little dull when the artwork is turned into a digital file, so removing it allows you to replace the background with something more vibrant and fitting to the products that you plan to use the design on.
In this tutorial, I’ll show you a simple way to remove the paper background from your art in Photoshop. There are so many different ways to do this, but I want to keep it simple. In future tutorials, I’ll dive into more detail on this topic, but I want to keep this one simple so you can easily get started right away! This will work best with a piece of artwork with one subject on a plain background. I’m going to use my signature art heart in my example!
Here is an example of my art heart with a transparent background on a piece of wood wall art on Society6! This tutorial will walk you through the process I took to turn my hand-painted art heart into a file with a transparent background.

Turn Your Art Into a Digital File
The first step is to turn your artwork into a digital file. I photograph my artwork with a high-quality camera to turn it into a digital file, but you can also scan it and achieve the same results. If you’re using a scanner make sure that your DPI (resolution) is set to at least 300 to ensure that your scan is high-res enough and doesn’t turn out blurry!
Open in Photoshop
The next step is to open your artwork file in Photoshop! Next, click the lock icon on the Background Layer to unlock it so that you can manipulate the layer.

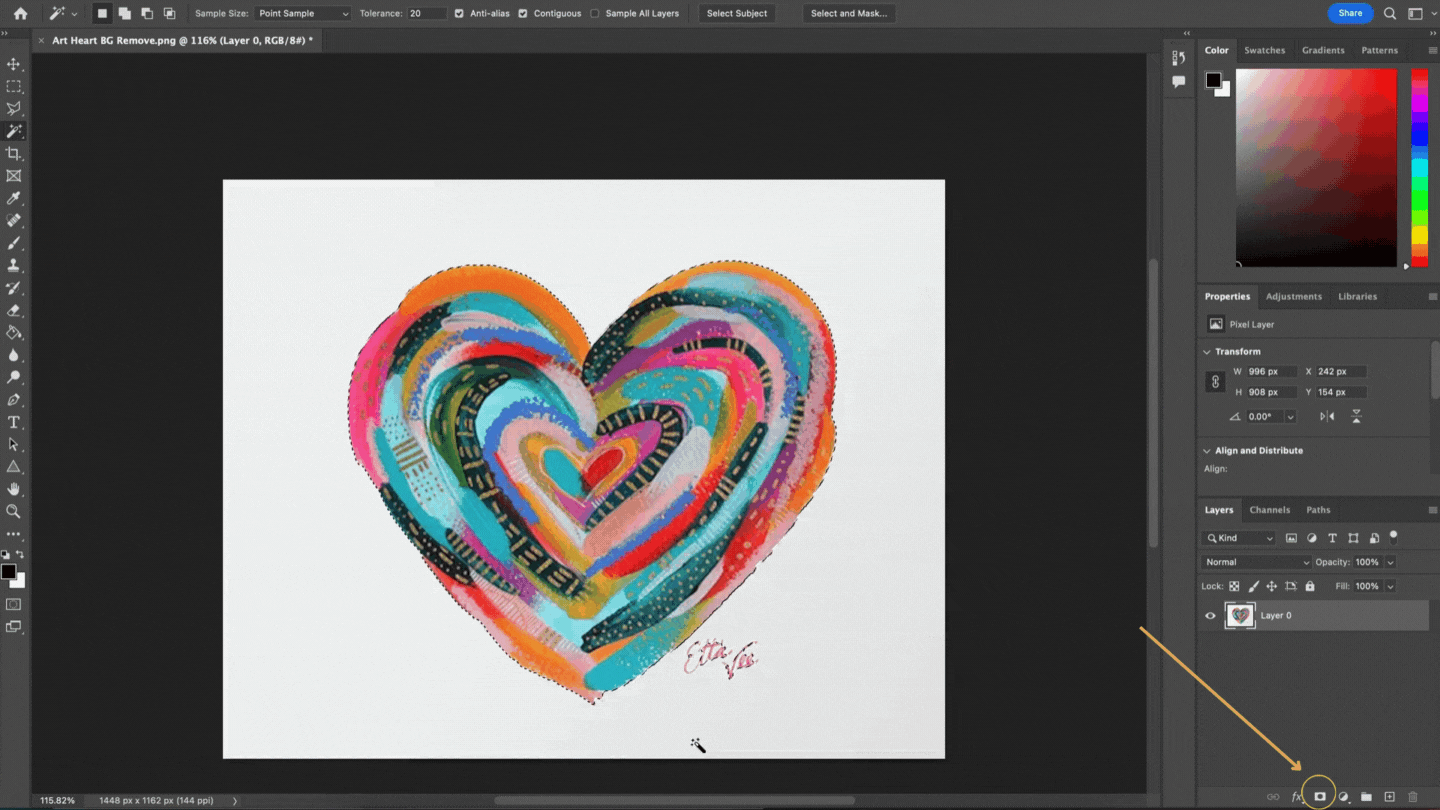
Magic Wand Tool
Next, grab the magic wand tool (keyboard shortcut: w).
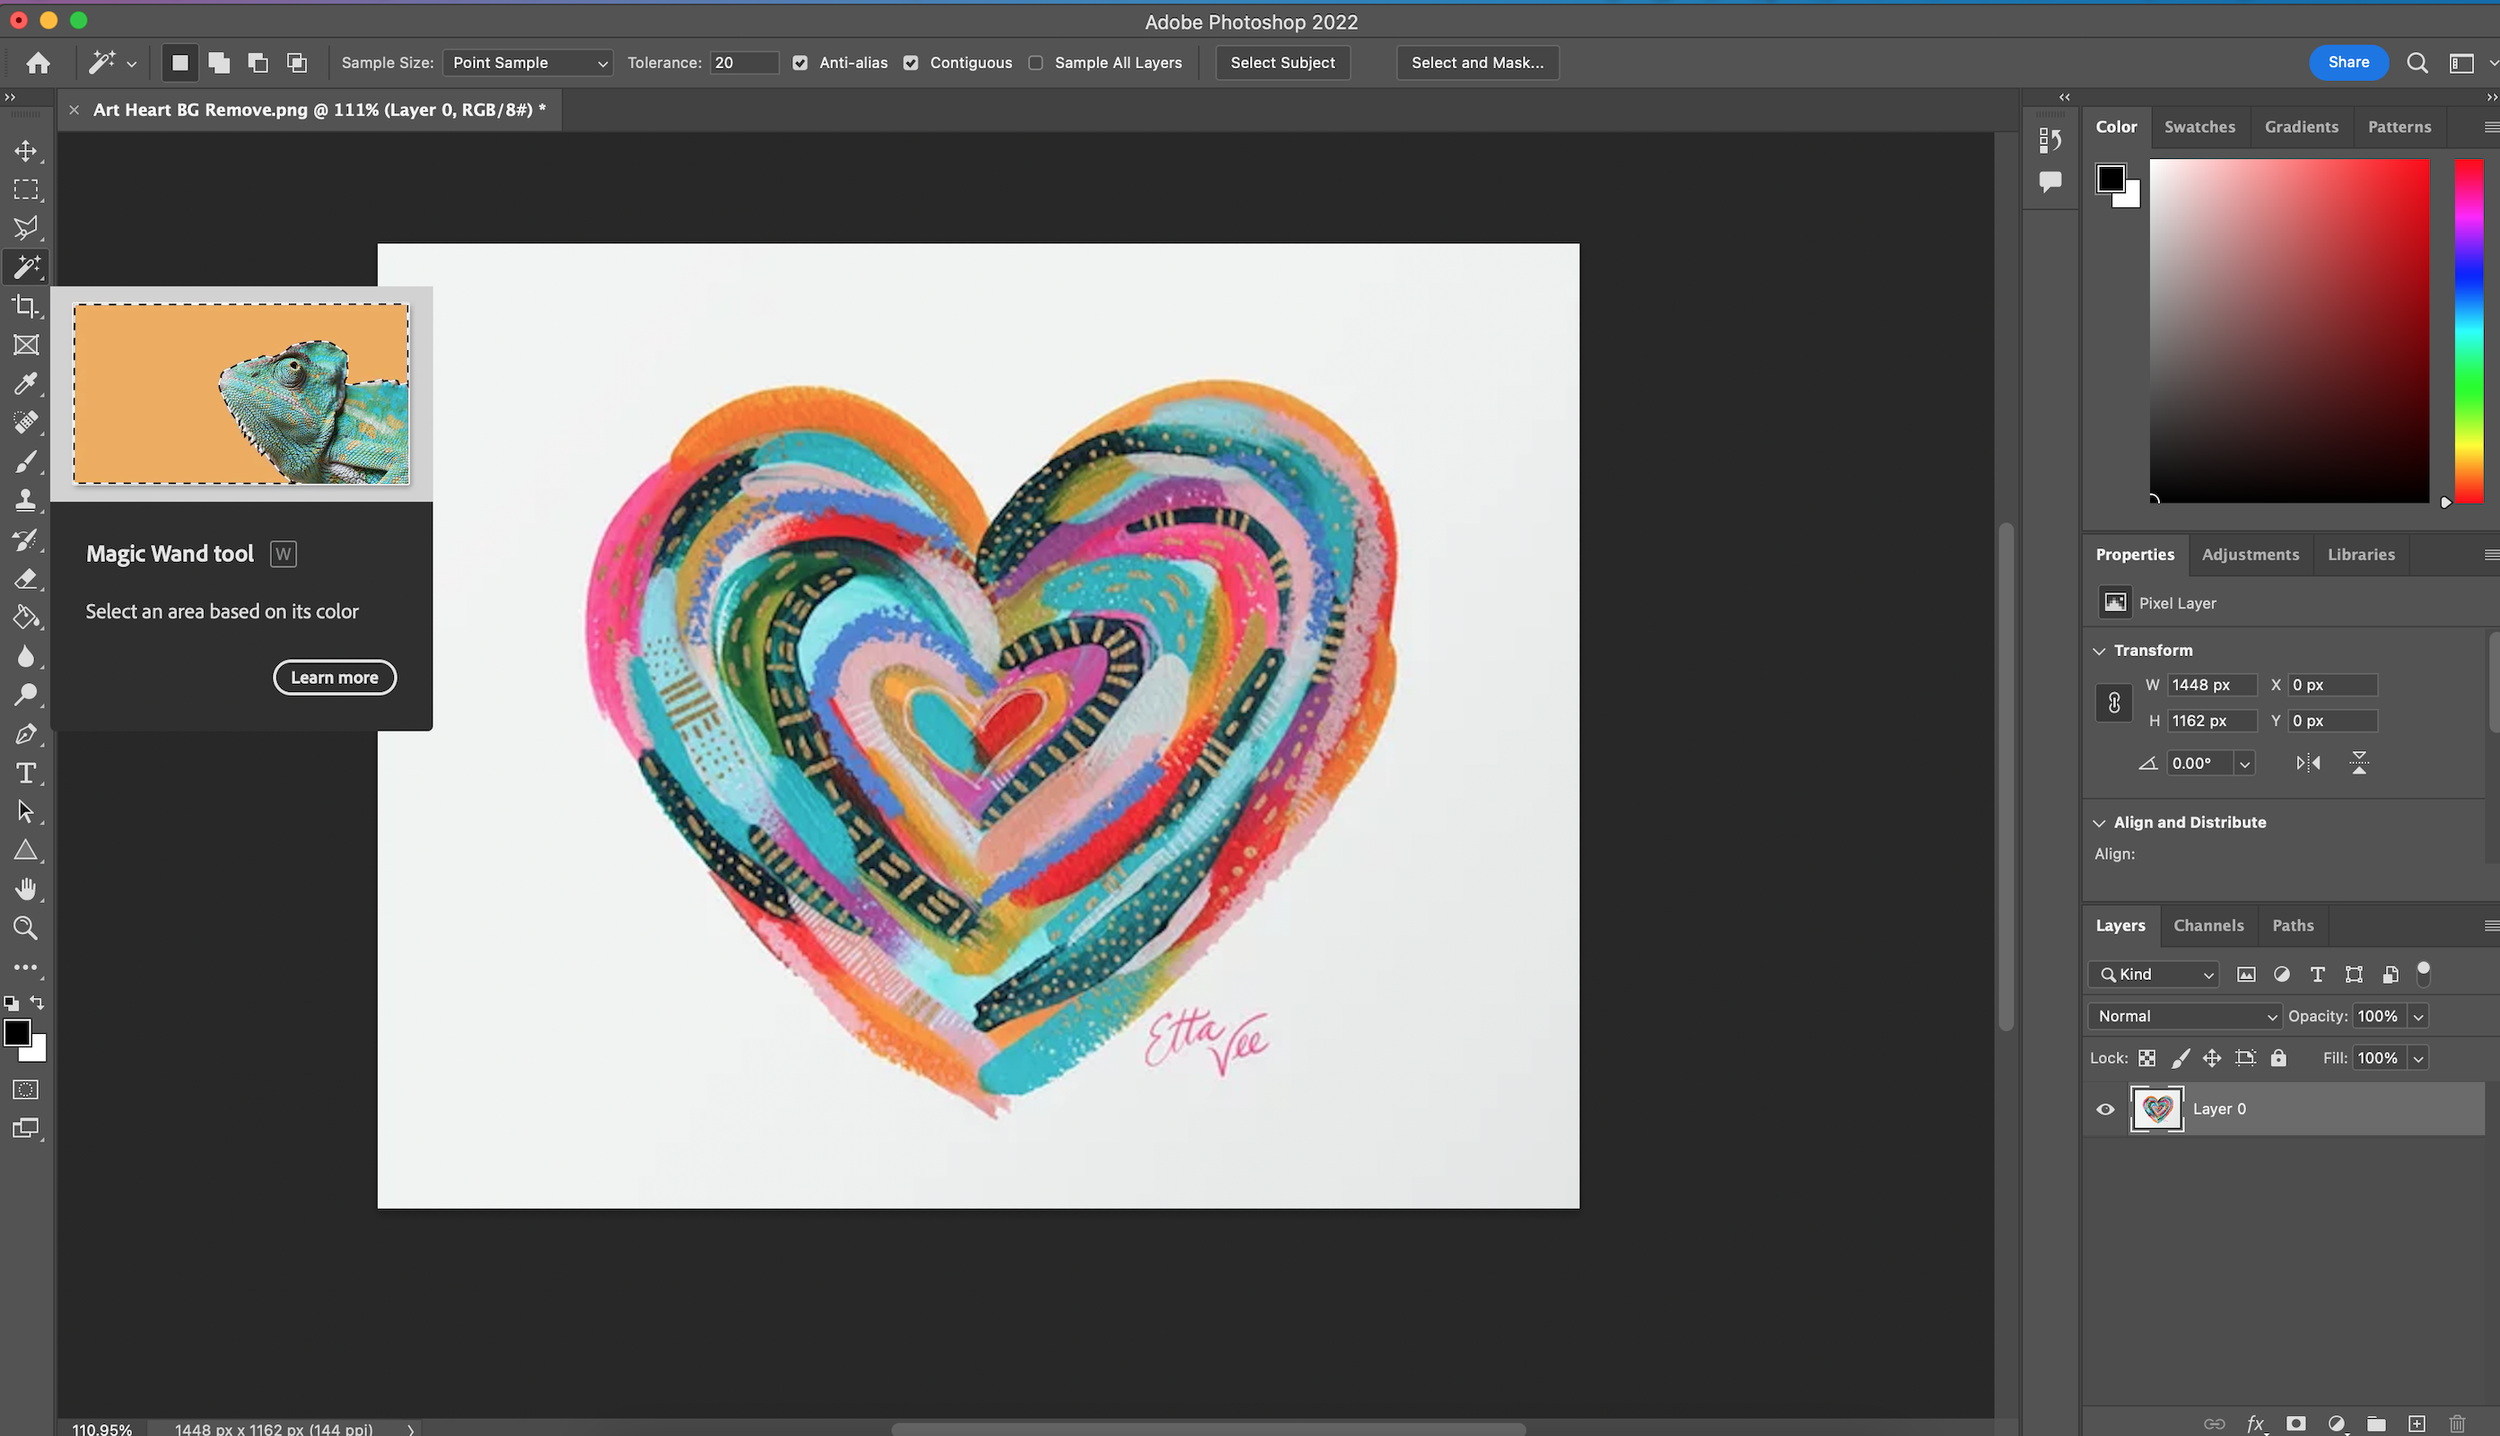
The magic wand tool allows you to automatically select things that are the same color and texture, and since this art heart is on a white background, we’ll be able to easily select it and remove it using this tool.
Before making the selection take a look at the settings bar at the top of your screen. Make sure that “Contiguous” is selected. This means that when you select the paper background it will only select white areas that are touching each other. Meaning that it won't select any stray white areas inside of your artwork.
Then check the “Tolerance” setting. I like to set mine to around 20. Tolerance indicates how sensitive the selection tool is going to be. Higher tolerance means it will be looser with its selection and lower tolerance means that it will be more selective! If you ever have any issues with your selection, play around with the tolerance number until you get it just right.

Next, click anywhere in the background of your illustration and watch the magic wand tool work its magic!
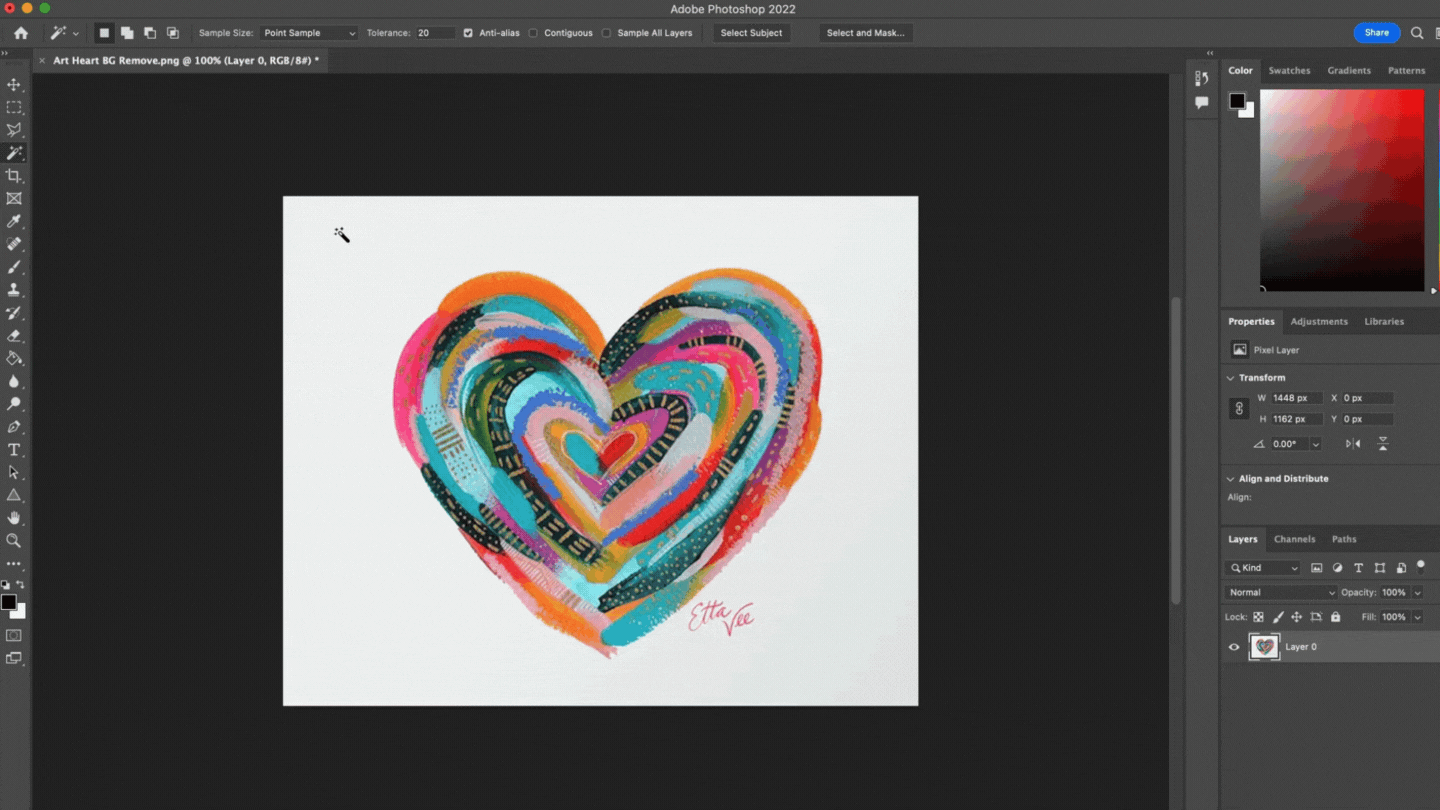
Now Photoshop has selected the entire background! There are a few final steps to take to clean up the selection and make it more natural.
Make The Selection More Natural
If you zoom in, you might notice that the selection is just the slightest bit off from your design resulting in a halo effect around your artwork. We can easily tighten that up so that there isn’t that white halo effect around the design when you remove the background.
Right now, the background is selected. We want to make sure that we inverse the selection so that the actual design is selected. You can do this by clicking Select → Inverse.
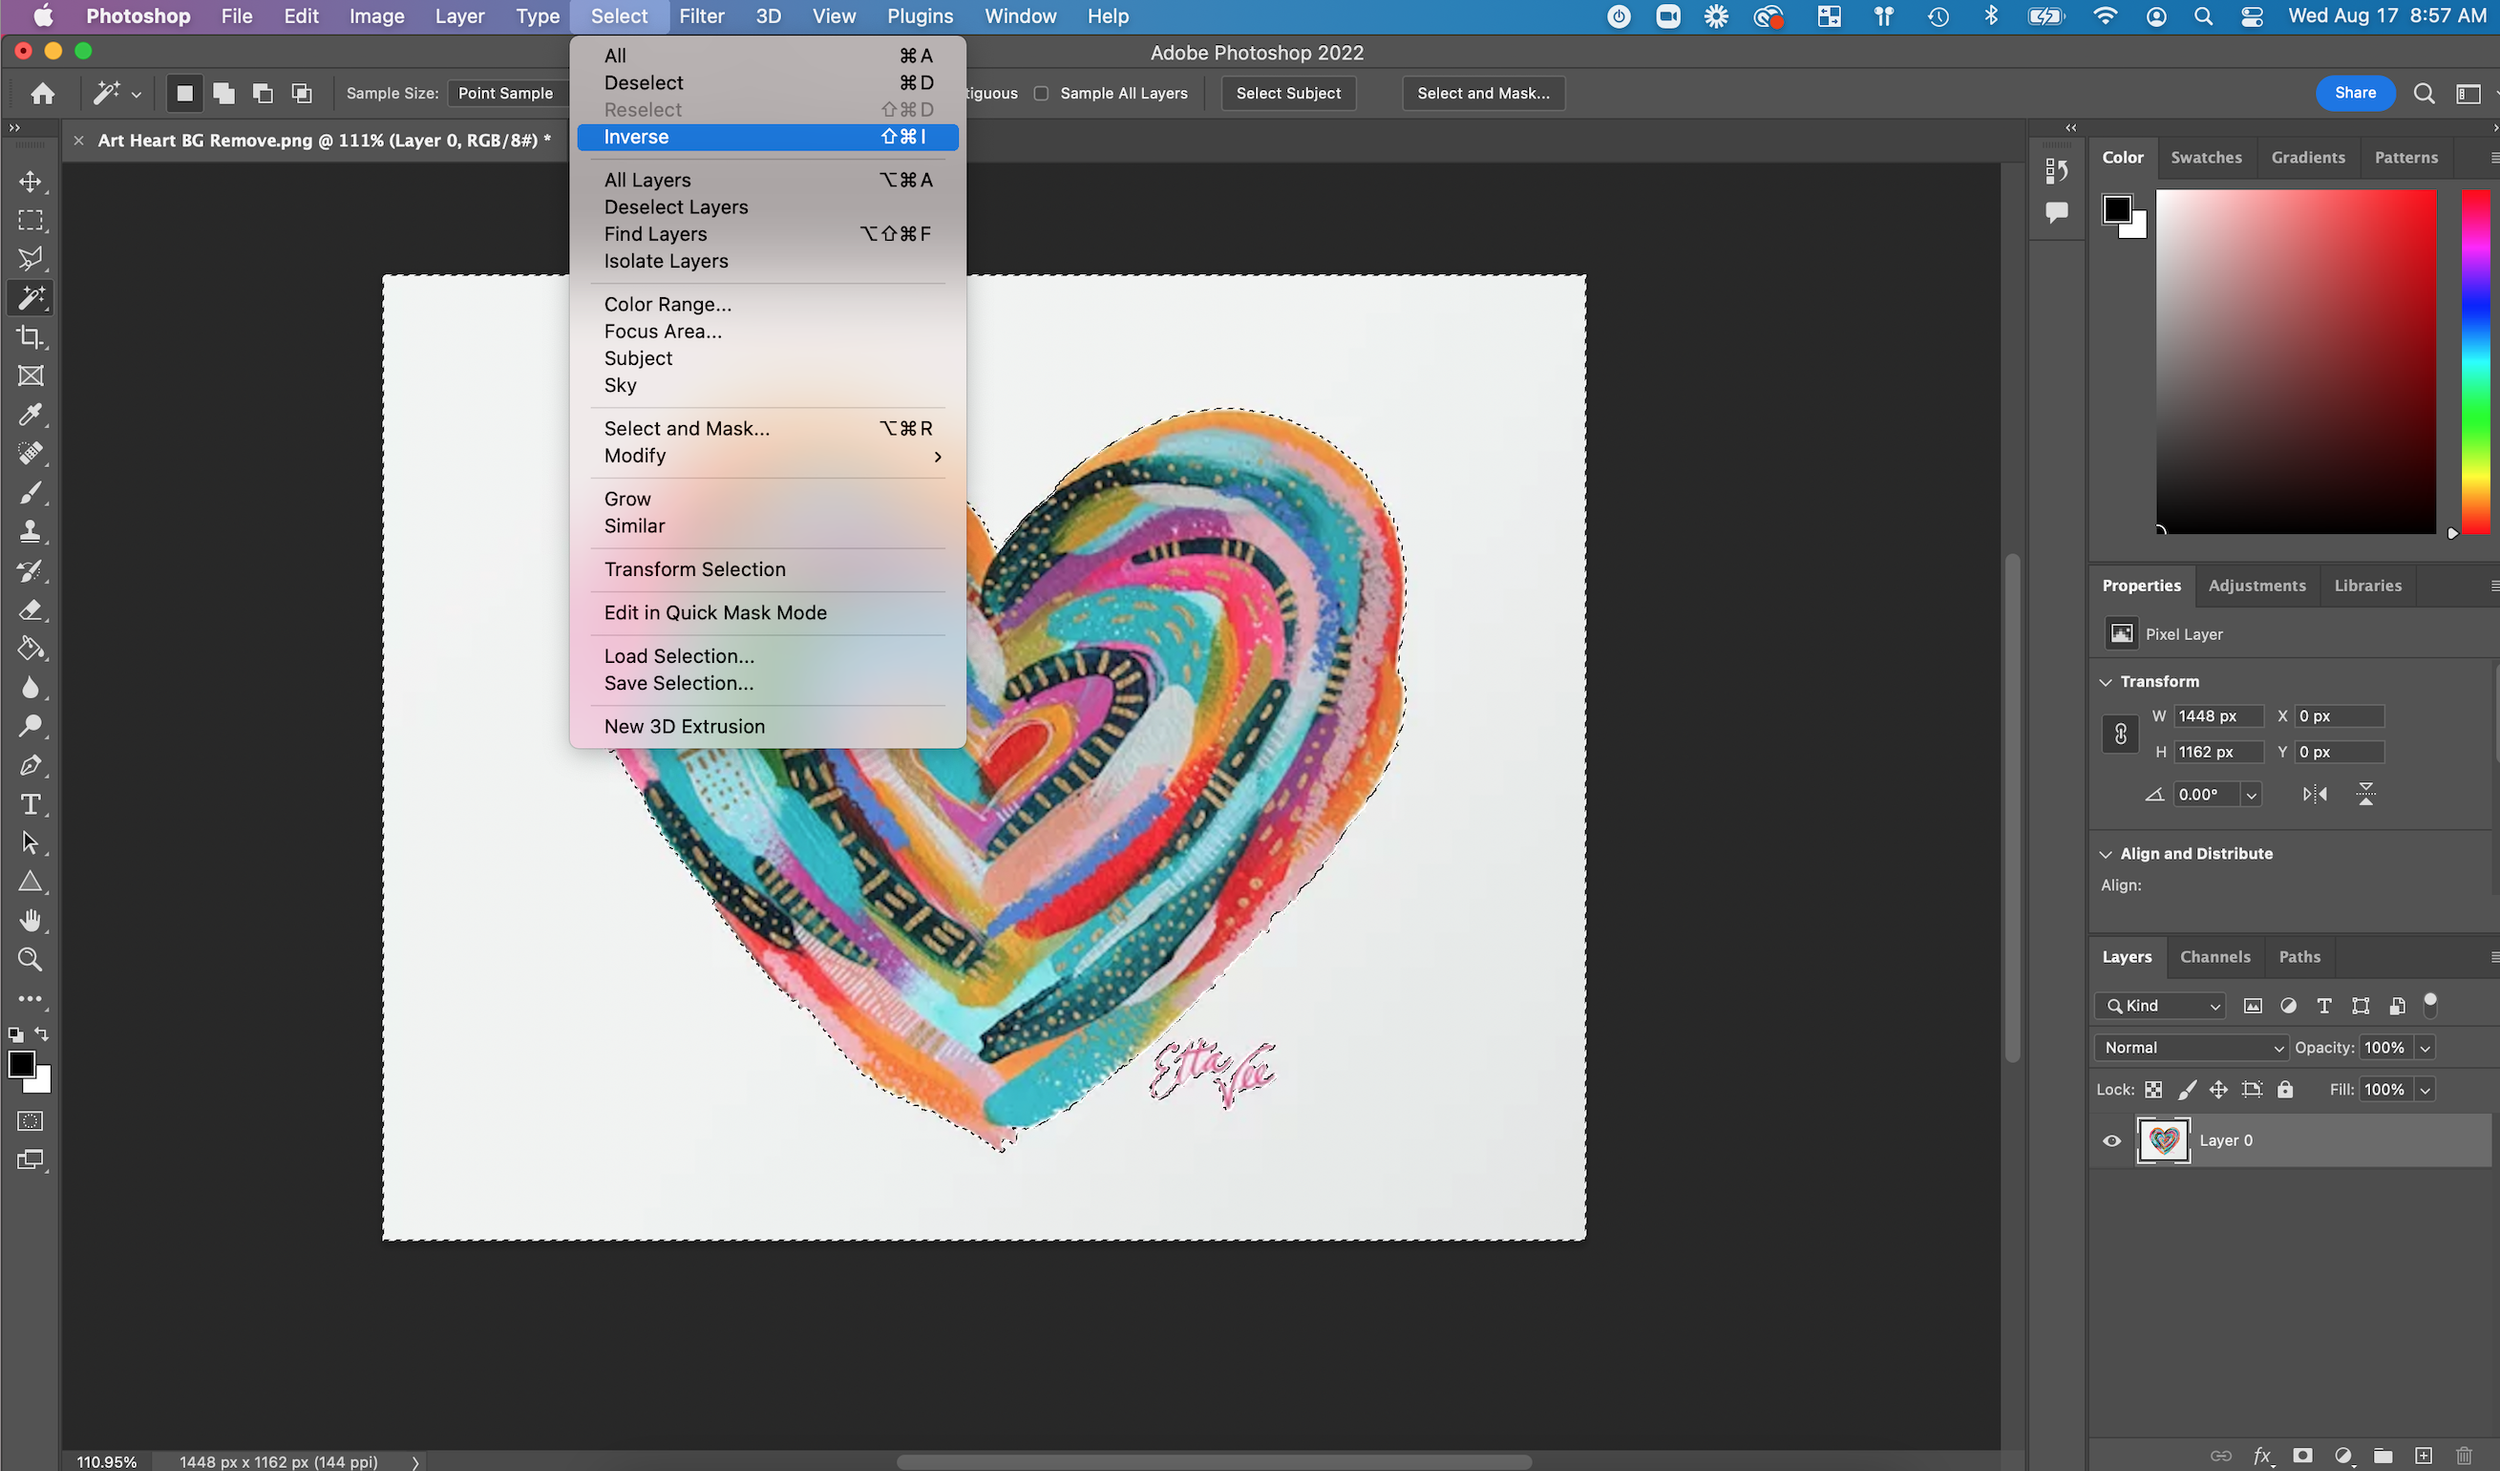
Now zoom in so you can see how tight your selection is. In my example, you can see that there is a slight white halo around the design.
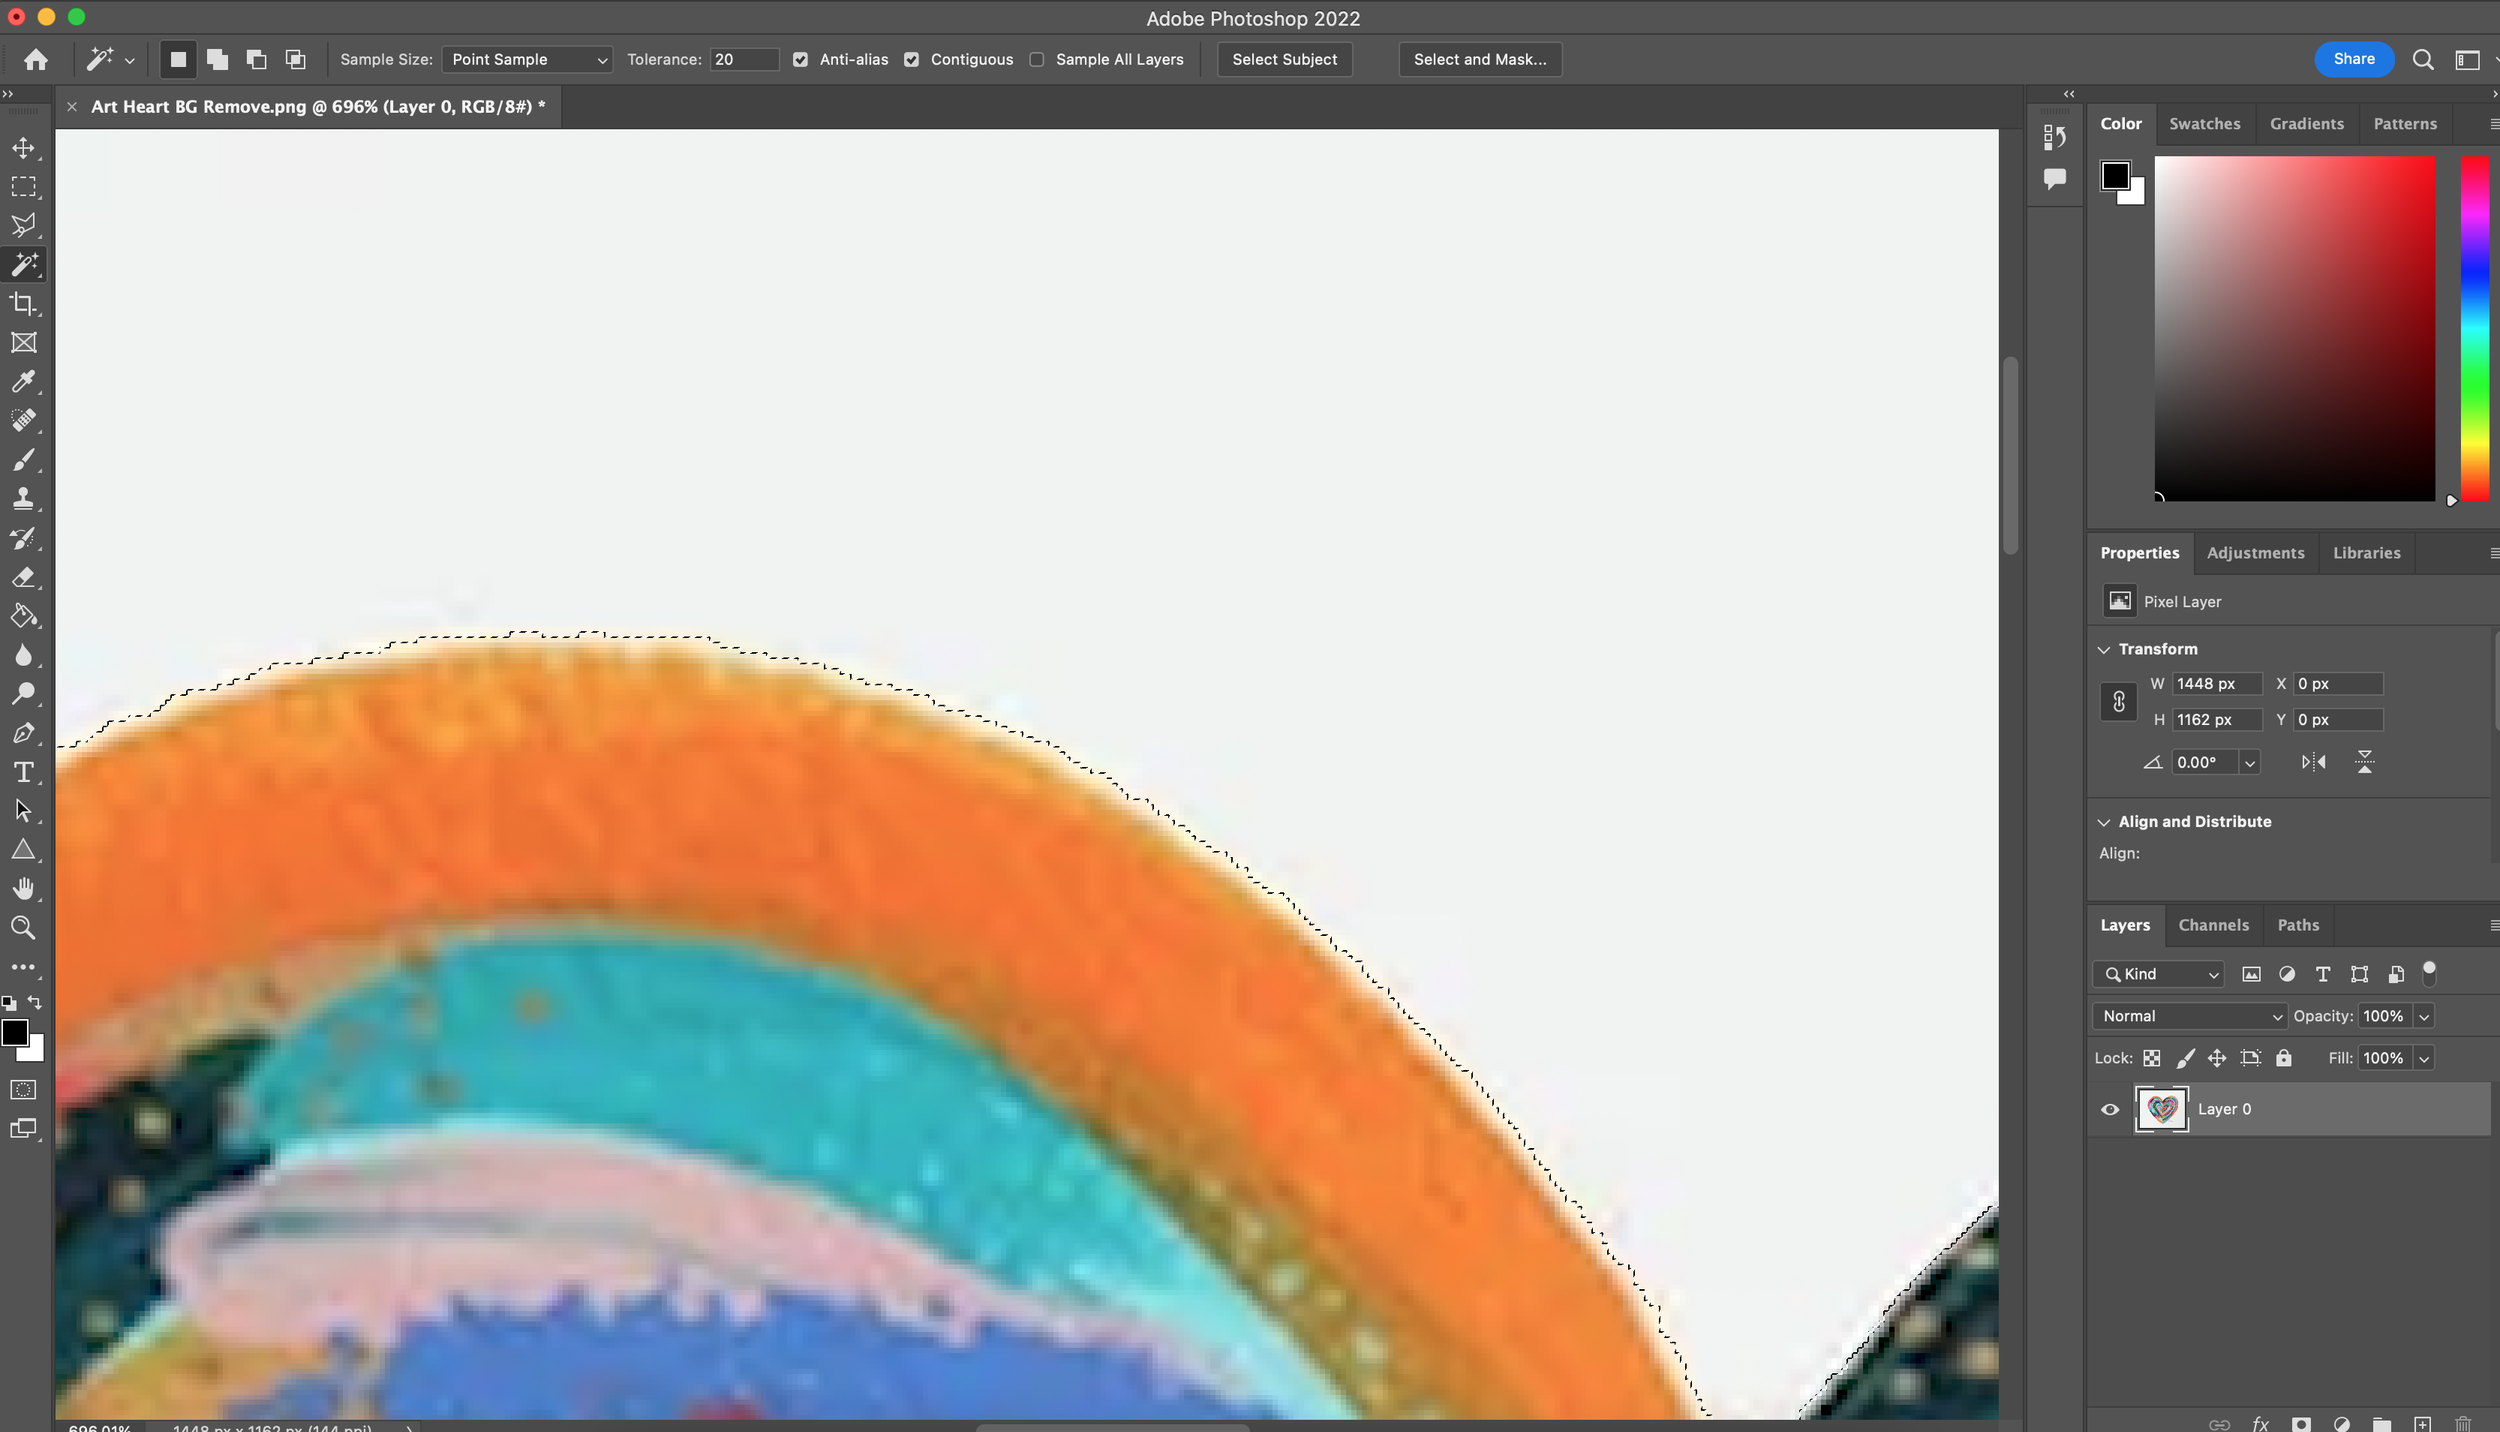
To make the selection tighter and more natural click Select → Modify → Contract. And tighten the selection by one to three pixels. This will bring that selection a little closer to the design and get rid of the halo effect.
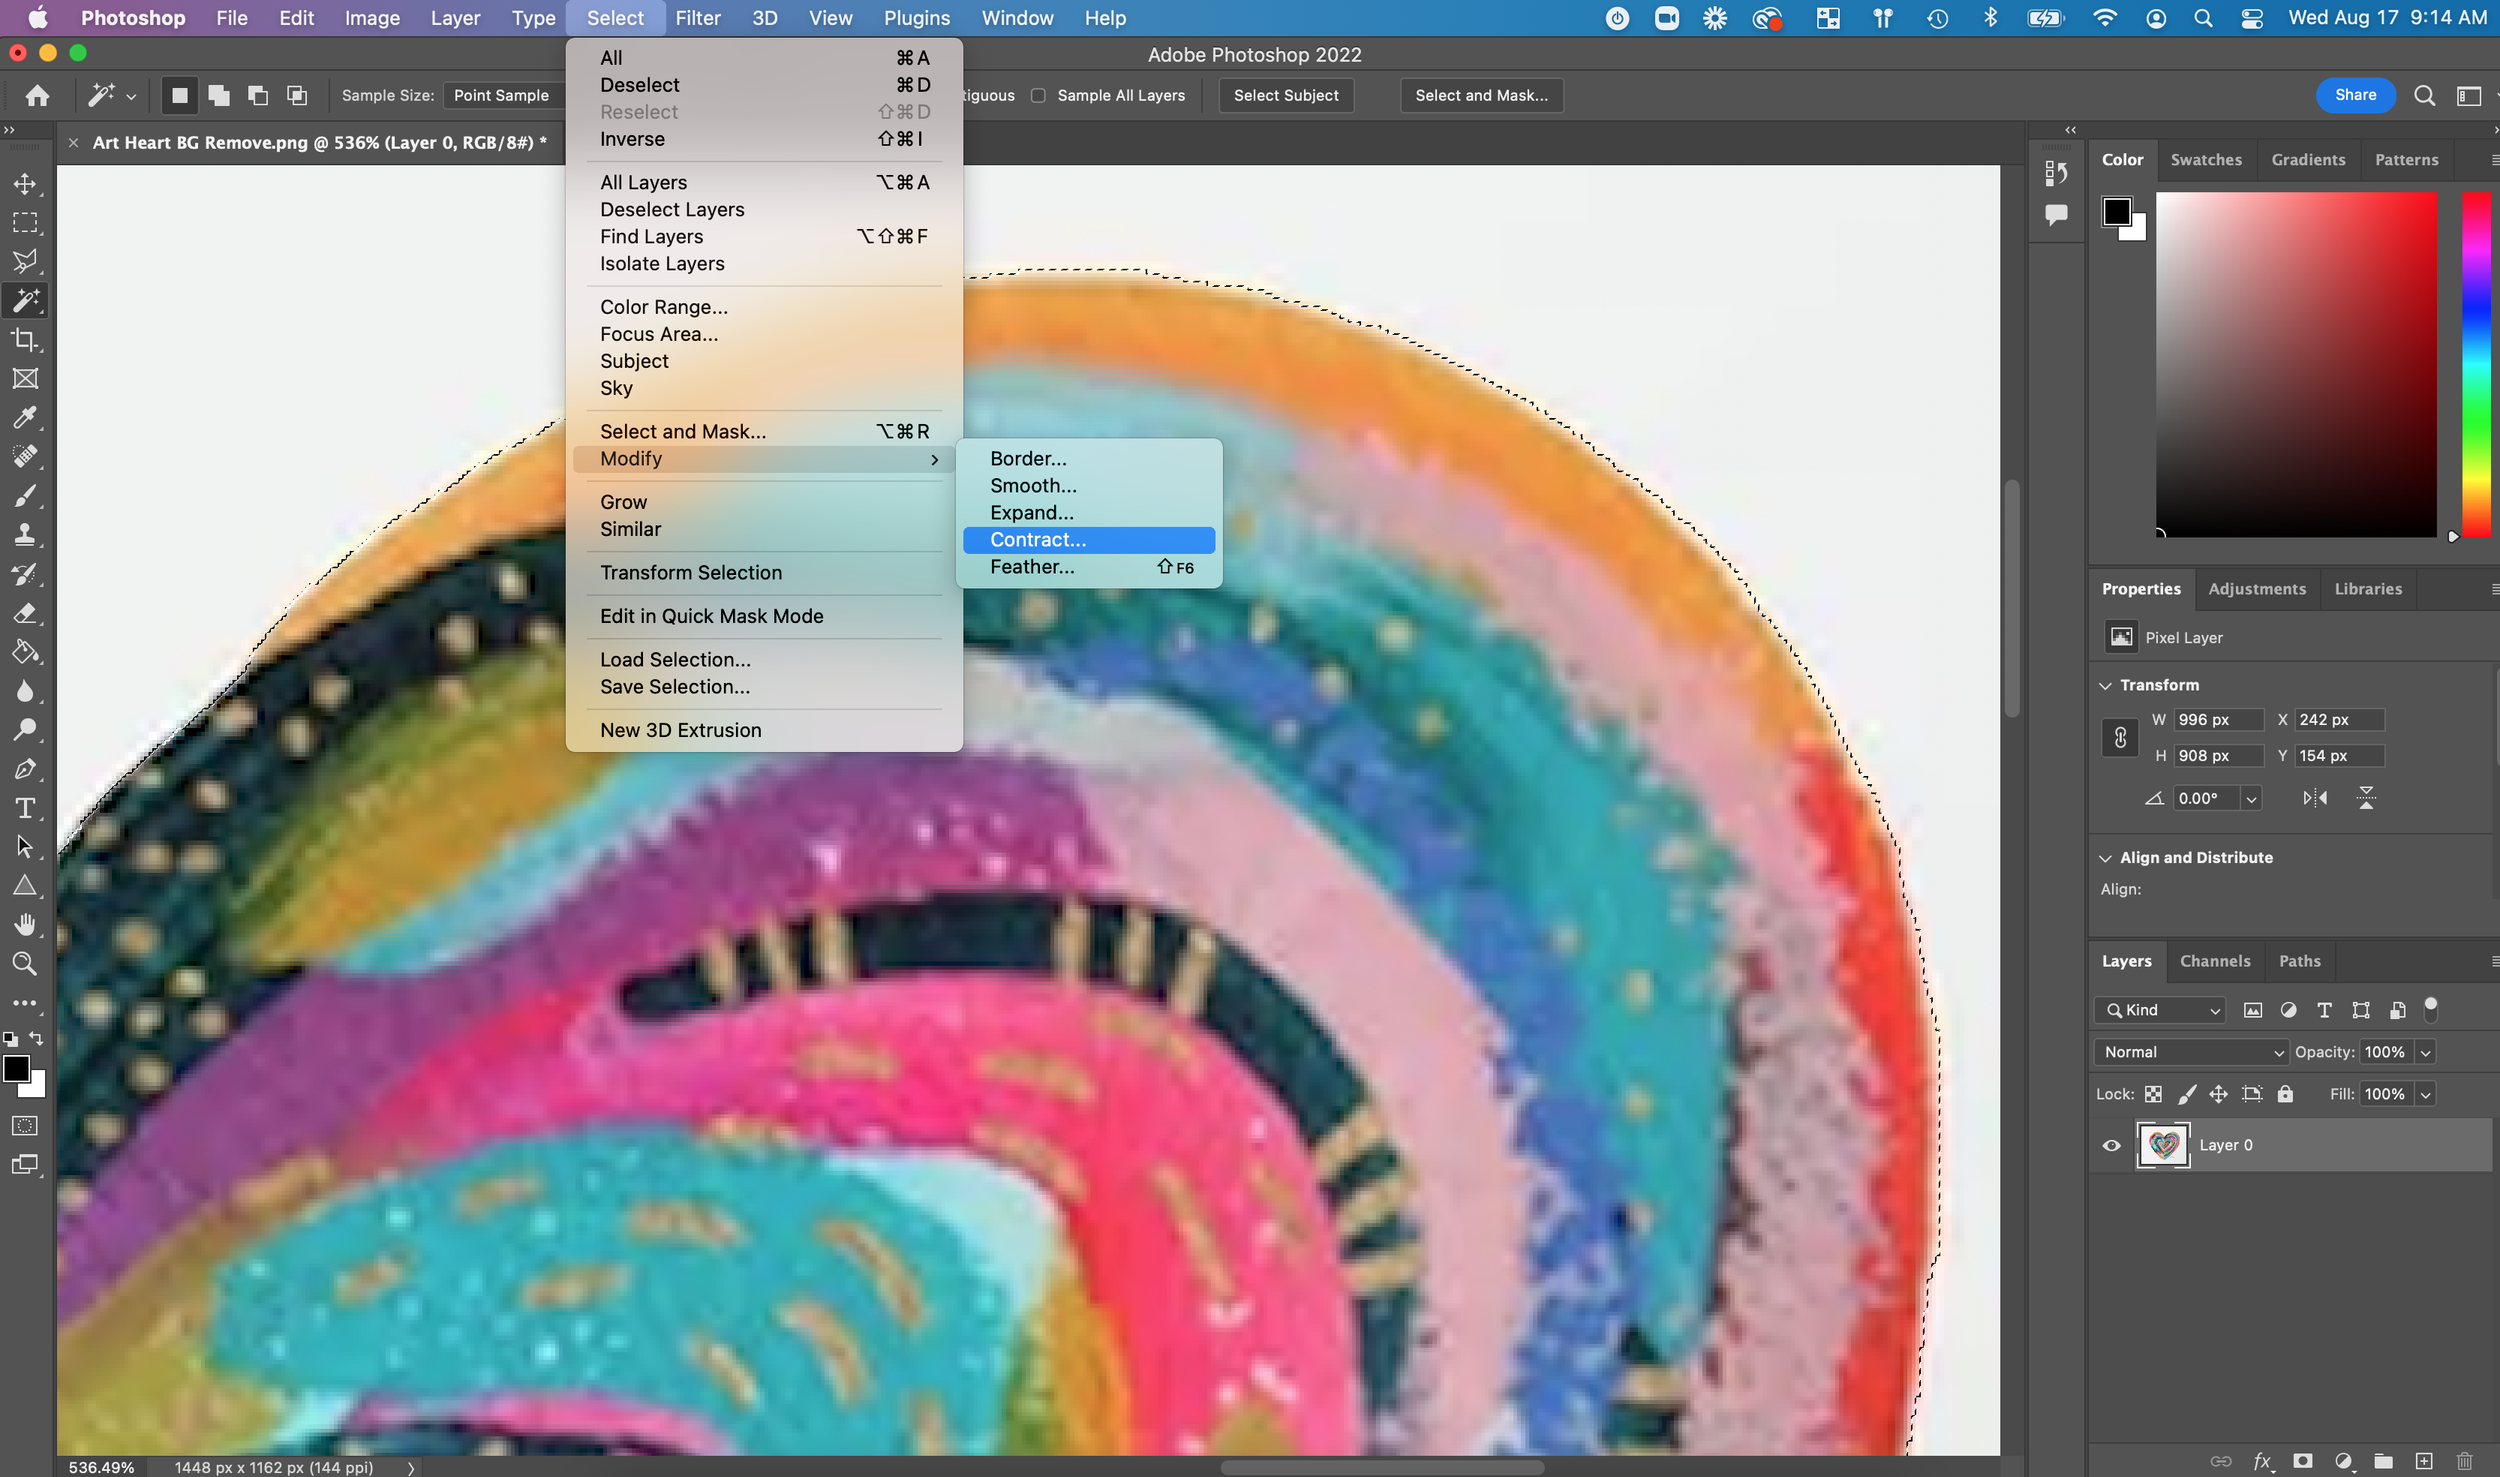
In my example, I contracted by two pixels and that worked to bring the selection to a tighter place.
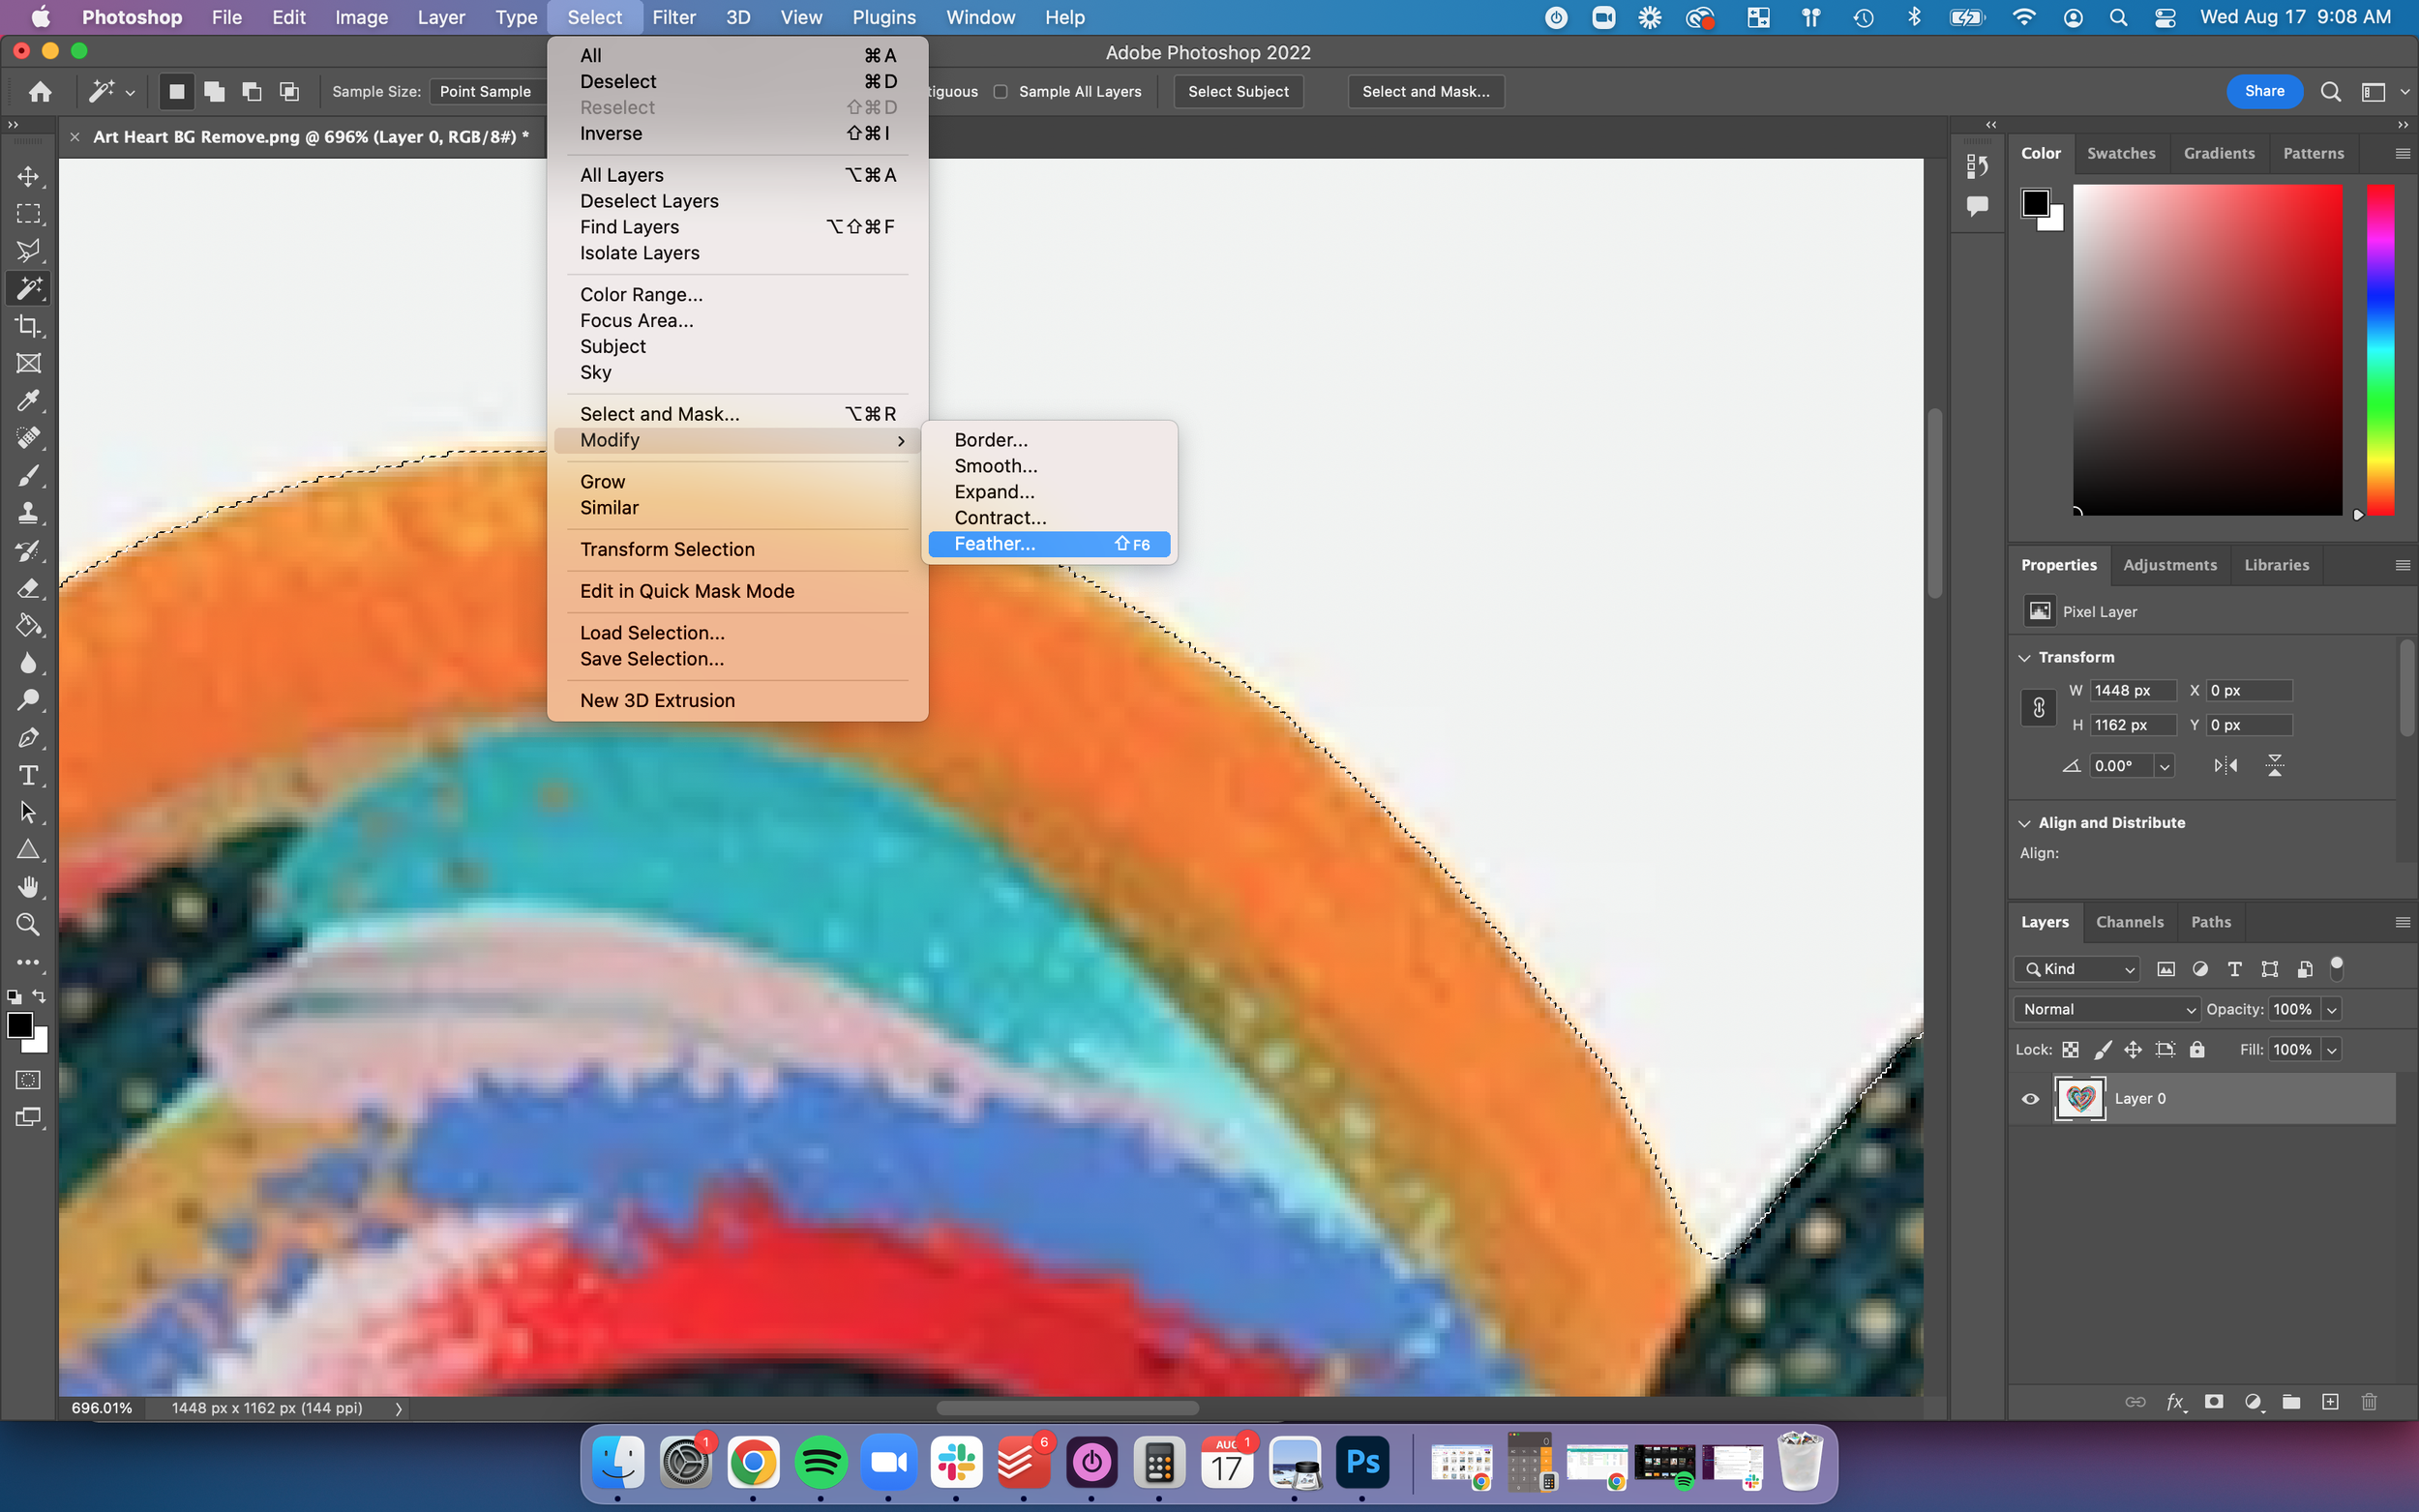
Now there’s one last step to make the selection look more natural. Go back to the select menu and choose Select → Modify → Feather. I generally feather by three pixels as this helps remove any jagged edges and keeps the integrity of the natural brushstrokes. Play around with what works for you, but generally around one to three pixels will work great!
Remove the Background
Now it’s time to remove the background! To do this in a non-destructive way, select a clipping mask. Click the clipping mask icon on the layers panel and your background will be removed! And the best part is that you can always delete the mask if you ever need to make any adjustments. This doesn’t permanently remove it - just hides it!
Now you’ll see that the white background has been replaced with a checkered background indicating that it’s transparent. If these steps removed your background, then you’re good to go! But I always like to do a final clean-up to make sure that my artwork is clean, polished, and ready to go on products!
Final Clean Up
In my example, there are a couple of things we need to do to clean up the final illustration before exporting it. You’ll notice that my signature is still at the bottom of the heart. I want to remove that so the design is on its own. This is super easy to do with a clipping mask!
If you have any straggler elements that didn’t get removed, you can easily remove them with the brush tool! Select the brush tool (keyboard shortcut: b) to start.
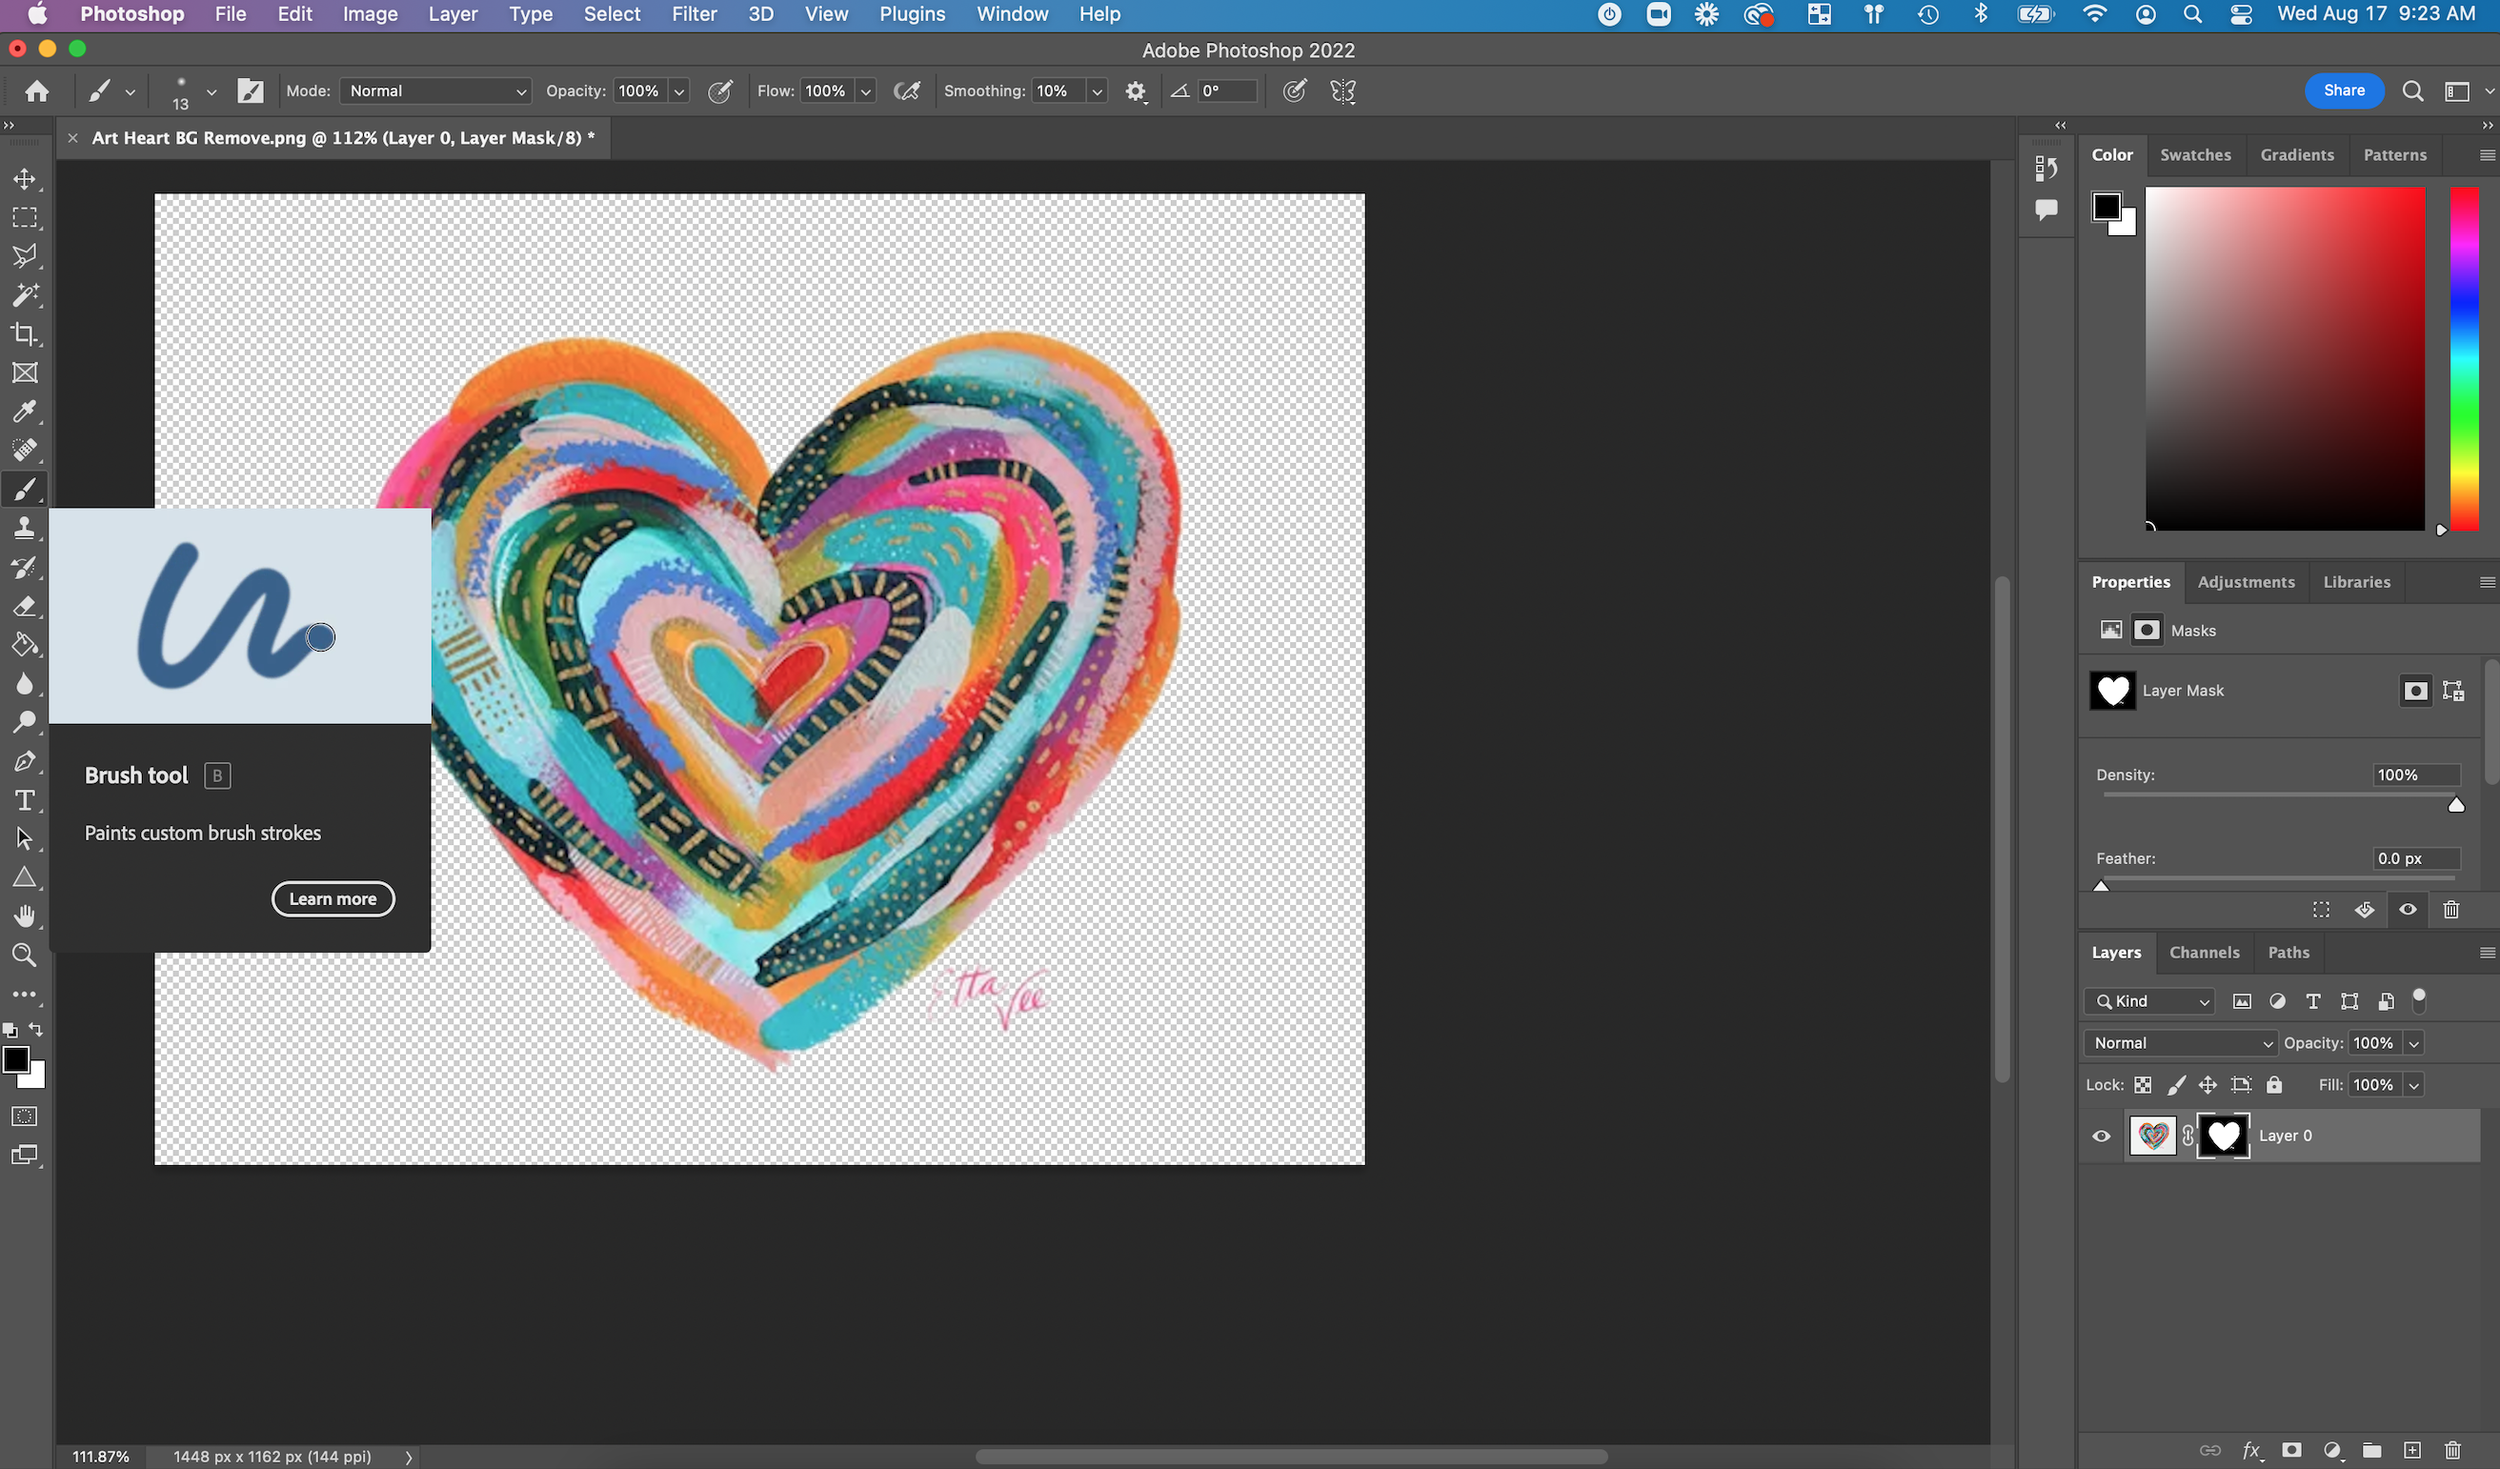
Now you can simply paint over any areas you want to remove! The way this works is that with a clipping mask, anything painted in black is concealed as part of the mask. So make sure that black is selected as your painting color, and you can simply paint over any extra areas that you want to remove!
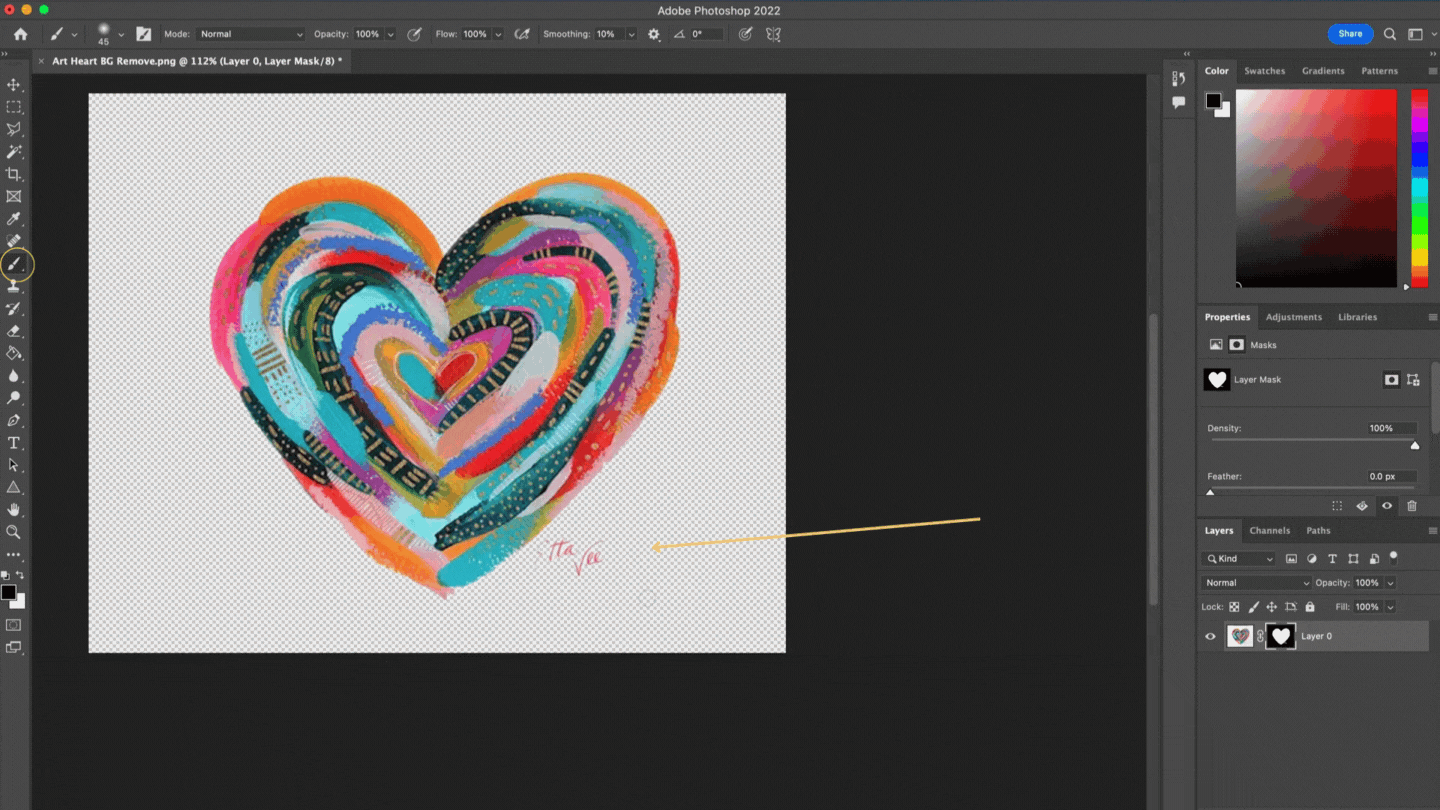
And there you have it! A finalized piece with a transparent background! Now you can export your artwork as a .png file to retain that transparency. I hope this tutorial was helpful! I hope to dive into more detailed digital art tutorials in the future, so keep your eyes on the blog for more!
xo, Jessi
Pin this post for later! 📌
Hover or tap on this image and click the “Save” button on the top left!
